
Fix Window and Door Efficiency in Older St. Louis Homes
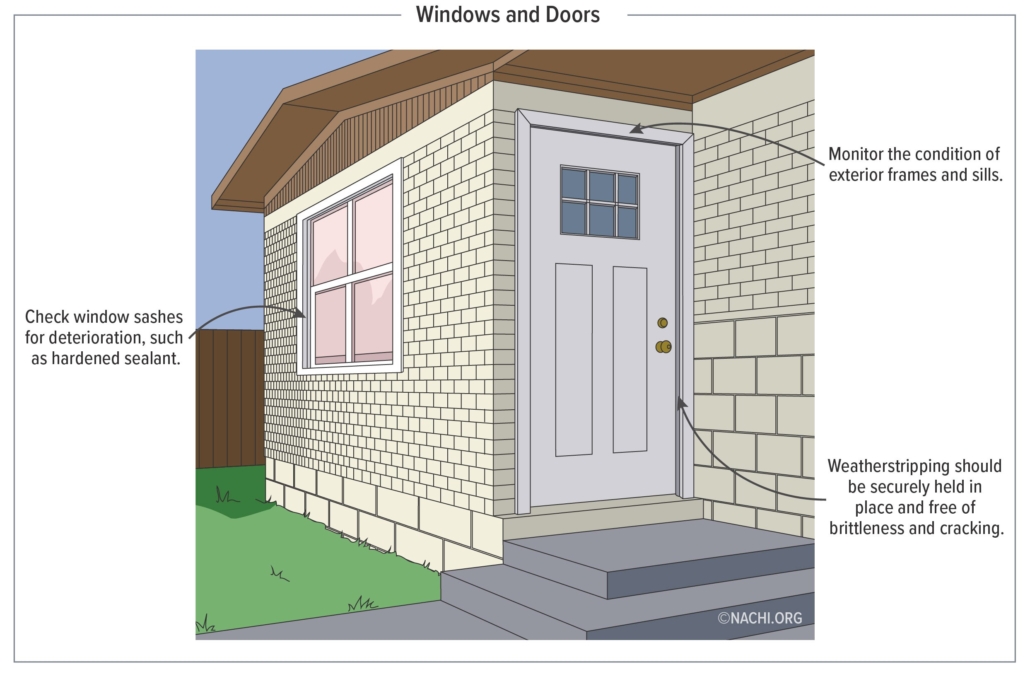
Older St. Louis homes have incredible bones, beautiful woodwork, and real character — but window and door efficiency is often the one area where those charm-filled houses quietly drain your wallet every single month. Before winter comes, fix window and door efficiency in older St Louis homes.
Home Maintenance · How-To Guide
A practical step-by-step guide to sealing the gaps, cutting energy loss, and getting more comfort from your older home.
Evergreen Property Inspectors · April 2026 · Veteran-Owned · St. Louis, MO
Bungalows in Bevo Mill, brick two-flats in Tower Grove South, craftsman cottages in Maplewood — St. Louis is packed with housing stock built between 1900 and 1960. So a lot of homeowners are working with original single-pane windows and doors that were never designed for today’s energy standards. The good news is that improving efficiency in these homes doesn’t have to mean a full replacement. Start here.
Step 1: Audit Your Windows and Doors for Air Leaks
Before you buy anything, figure out what you’re actually dealing with. On a windy day, hold a lit incense stick or a thin piece of tissue near every window frame and door edge. If it flickers, you’ve found a leak.
Pay close attention to the corners of window sashes, the bottom door threshold, and any spot where wood trim meets the wall. In older St. Louis homes, settling over decades can pull frames slightly out of square. That creates gaps you can’t always see but definitely feel in January.
Also check the glazing compound on single-pane windows. This is the putty-like material that holds the glass in the frame. It dries out, cracks, and crumbles over time. Cracked glazing is one of the top sources of cold-air infiltration in homes built before 1970.
Step 2: Reglaze or Repair Before You Replace
Replacing original wood windows is expensive and, honestly, often unnecessary. In fact, a well-maintained wood window can perform surprisingly well once you address the glazing and weatherstripping.
Pick up a tube of DAP 33 glazing compound at any hardware store. Scrape out the old crumbling putty with a stiff putty knife, prime the bare wood lightly, and press new glazing compound in at a 45-degree angle. Let it cure for at least a week before painting over it. This single repair can meaningfully improve your window and door efficiency without touching your window budget.
For doors, check the condition of the door stop and the fit of the door in the frame. A door that doesn’t close flush needs adjustment before weatherstripping will work properly. Tighten hinge screws first. Use longer 3-inch screws to pull the door back into alignment if it’s sagging.
Sealing a drafty old window costs a few dollars and twenty minutes. Ignoring it costs you on every utility bill for years.
Step 3: Choose the Right Weatherstripping for Each Opening
Not all weatherstripping is created equal, and using the wrong type is a common mistake. Here’s a quick breakdown by application.
- V-strip (tension seal): Best for the sides of double-hung windows and the edges of doors. It’s durable, nearly invisible, and self-adjusting.
- Foam tape: Works well for irregular gaps on window sashes. Not as long-lasting, but very affordable and easy to apply.
- Door sweeps: Attach to the bottom of exterior doors to seal the gap above the threshold. Automatic door sweeps rise when the door opens and drop when it closes.
- Rope caulk: A seasonal option for windows you don’t open in winter. Press it into gaps and peel it off in spring. Great for older homes in Dogtown or Carondelet where windows are original but in good condition otherwise.
For casement windows, use compression-style weatherstripping around the entire perimeter. This type compresses when the window closes and creates a much tighter seal than foam tape alone.
Step 4: Improve Window and Door Efficiency with Interior Film or Storm Options
If your windows are single-pane and air sealing alone isn’t cutting it, interior window film is a practical next step. 3M and Frost King both make shrink-film kits that create a dead-air space between the film and the glass. This mimics the insulating effect of a second pane and costs a fraction of full replacement.
Storm windows are an even better upgrade. According to the U.S. Department of Energy’s EnergySaver program, adding a storm window over a single-pane unit can reduce heat loss through that window by 25 to 50 percent. For a home in Clayton, Webster Groves, or Shaw with original wood windows worth preserving, storm windows are often the smarter long-term investment.
On the door side, consider adding a full-length storm door if your exterior door faces north or west. St. Louis winters put serious pressure on northwest-facing entries, and a storm door adds a meaningful buffer while also protecting the exterior door itself from weathering.
Step 5: Caulk the Exterior and Check the Door Threshold
Head outside. Run a bead of paintable exterior caulk along every joint where the window trim meets the siding. Use a caulk rated for exterior use and temperature swings. In St. Louis, where temps can swing 40 degrees in a single week, flexibility matters. Silicone-latex blends hold up well here.
At your exterior doors, inspect the threshold. If you can see daylight under the door when it’s closed, the threshold needs adjustment or replacement. Most adjustable thresholds have screws on top that raise or lower the seal. A quick turn of a screwdriver and a proper seal can make a real difference on a cold February morning in Kirkwood or South County.
The ENERGY STAR home sealing guide recommends addressing both window and door perimeters before upgrading to new units. It’s almost always the better first move.
Step 6: Get a Professional Eye on the Bigger Picture
DIY air sealing goes a long way. Still, some efficiency problems point to deeper issues: failed window seals, rotted framing, deteriorating door jambs, or even moisture intrusion behind the trim. These aren’t things you can spot with a tissue and a flashlight.
A home inspection by an ASHI- or InterNACHI-certified inspector gives you a full picture of what’s happening at your windows and doors — and the rest of the house. Keep in mind that Missouri has no state licensing requirement for home inspectors, so certification from ASHI or InterNACHI is how you know your inspector has met a real professional standard.
Evergreen Property Inspectors works with homeowners and buyers throughout Greater St. Louis and Southern Illinois. Their certified inspectors flag window and door issues as part of a thorough evaluation that helps you prioritize repairs with confidence. Ready to know exactly where your home stands? Schedule your inspection with Evergreen Property Inspectors online or call 877-805-5255.
|
Homeowner Tip: Before listing an older St. Louis home for sale, address the obvious window and door efficiency issues yourself first — fresh weatherstripping, reglazed windows, and a working door sweep signal to buyers that the home has been well maintained. Small investments in these visible details can support a stronger asking price and fewer negotiating points at the inspection stage.
|
|
Ready to schedule your St. Louis home inspection? Certified inspectors. Honest reports. Peace of mind before you close. Veteran-Owned · ASHI & InterNACHI Certified · Greater St. Louis & Southern Illinois |


Leave a Reply
Want to join the discussion?Feel free to contribute!